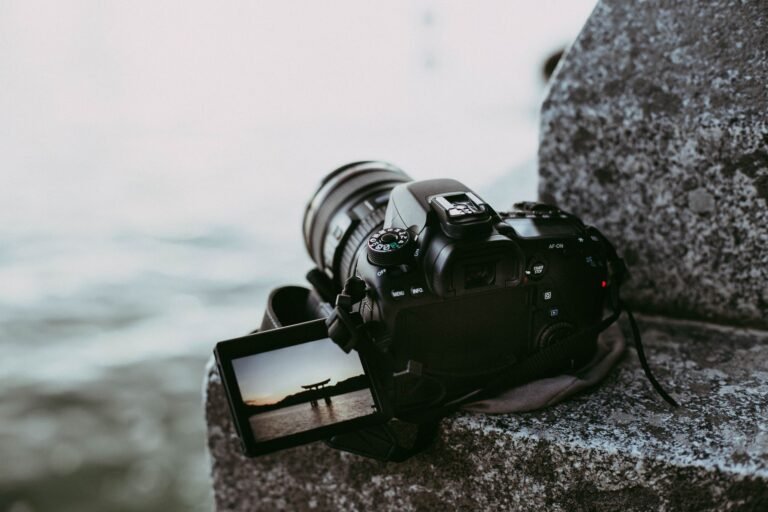

Incoming light passes through the camera lens, becomes electrical charge on an image sensor, and is processed into a finished photo. Your phone controls focus, exposure, color, and file format within fractions of a second.
This explanation covers hardware, image processing, zoom, low-light limits, and privacy controls for anyone who wants clearer, more predictable photos from a phone camera.
A Tiny Camera System Captures the Scene
Light starts the entire process before the shutter button responds. A camera lens directs rays through an aperture onto an image sensor, where an image signal processor, or ISP, receives the capture data. Your phone has only fractions of a second to gather enough light and turn it into a usable image.
Each Hardware Part Has a Separate Role
The lens bends incoming light so it forms an image on the sensor. Its aperture is a fixed opening that limits incoming light. Because a phone lens is physically small, your camera depends heavily on sensor design and processing after exposure.
| Part | What it does | What you see |
|---|---|---|
| Lens optics | Direct light toward the sensor | Field of view and edge sharpness |
| Aperture | Limits incoming light | Brightness and depth of field |
| CMOS sensor | Converts photons into electrical charge | Detail, noise, and dynamic range |
| Autofocus motor | Moves lens elements into focus position | Sharp subjects rather than soft outlines |
| Optical image stabilization (OIS) | Offsets small hand movements | Cleaner low-light shots and steadier video |
| Image signal processor | Interprets sensor data | Color, contrast, noise, and saved files |
Your image sensor does not receive a finished picture. It receives a patterned field of light measurements from a bright window, a dark jacket, and skin tones. The ISP turns those varying energy levels into an image that looks natural on your display.
Small Hardware Relies on Fast Computation
A sunset portrait shows how the parts work together. The lens directs light at the sensor, autofocus places the face in focus, and OIS limits hand shake. Processing then holds detail in the orange sky while lifting detail in the face.
That handoff explains why two phones with similar hardware can produce very different photos. The light path supplies the raw material, while the ISP decides how each measurement becomes a colored pixel. Smartphone camera physics explained at this level is light becoming electrical data before software shapes its appearance.
Light Becomes a Digital Photo in Six Stages
Each pixel begins as a light measurement rather than a red, green, or blue square. CMOS sensor photodiodes collect photons and convert their energy into electrical charge. More light creates more charge, giving your phone a stronger signal for the next stage.
The Capture Path Follows a Fixed Order
- Gather light. Lens elements bend rays from the scene and project them toward the sensor plane.
- Limit exposure. The aperture and shutter timing control how much light reaches each photodiode.
- Collect charge. CMOS photodiodes convert captured photons into an electrical signal at each sensor site.
- Digitize values. An analog-to-digital converter turns each electrical signal into a numerical brightness value.
- Rebuild color. Demosaicing estimates red, green, and blue values across the output image.
- Encode the file. Processed data is saved as HEIF, JPEG, or RAW, based on your camera setting.
Most phone sensors use a Bayer color filter. Each sensor site sits under a red, green, or blue filter, with green appearing twice as much because human vision is highly sensitive to green detail. Your phone estimates the two missing color values at every location.
Demosaicing Reconstructs Full Color
Demosaicing studies nearby sensor sites to fill missing color data. A red sample beside green and blue samples becomes part of a full RGB pixel. Fine hair, fabric threads, and tree leaves make this task difficult because abrupt detail can resemble false color.
File choice preserves different amounts of that capture data. JPEG compresses a finished image for smaller storage use, while HEIF stores efficient high-quality images. RAW retains far more sensor data, so you have more room to change exposure and white balance later.
How smartphone cameras work step by step becomes clearer in a dim room. Exposure settings shape the raw signal before the ISP brightens shadows, smooths noise, or adjusts color. Your result still depends on how much usable light reached the sensor.
That available light is governed by exposure time, aperture, focus, and the phone’s ability to hold still.
Exposure, Focus, and Stabilization Shape Raw Capture
A dim room forces trade-offs within milliseconds. Exposure depends on aperture, shutter time, and sensor sensitivity, also called ISO. A wider aperture admits more light, a longer shutter gathers light longer, and higher sensitivity amplifies a weaker electrical signal.
Brightness Carries Three Trade-Offs
Long shutter times brighten a scene but record subject movement as blur. High ISO brightens a file but also raises visible noise, the speckled texture that weakens smooth shadows. Your camera app hides much of this math, yet the trade-off remains visible in the photo.
Hold your phone with both hands and pause after pressing the shutter in dim light. Optical image stabilization reduces hand shake, but it cannot freeze a moving child, pet, or passing car.
Optical image stabilization moves a lens group or sensor module opposite to small hand movement. That physical correction permits longer handheld exposures than an unstabilized module. Electronic stabilization can steady video, though it can crop the frame.
Autofocus Uses Distance and Contrast
Autofocus moves lens elements until the projected image looks sharp on the sensor. Phase-detection pixels compare light from opposite sides of the lens and estimate the needed lens movement. Contrast detection searches for the position where edges look most distinct.
How smartphone cameras focus depends on clear detail reaching the autofocus system. Close objects, plain walls, dim scenes, and fingerprints on lens glass can confuse it. Tap the subject on your display, wipe the lens with a soft cloth, and step back a few inches from very close subjects.
- Soft indoor photo. Brace your hands, add light, or use Night mode to avoid a long blurry exposure.
- Missed face focus. Tap the face before shooting so autofocus has a clear target.
- Moving subject. Use brighter light or a motion-focused camera mode that favors a shorter shutter time.
- Hazy image. Wipe the lens cover because skin oil scatters light and lowers contrast.
Focus and exposure determine what reaches the sensor. Lens choice determines how much of the scene enters that capture, which is why multiple rear cameras change more than the zoom number on your display.
Multiple Lenses Change the View Before Processing
A three-camera phone does not use three identical viewpoints. Each rear module has its own lens design and focal length, so switching lenses changes framing before any crop appears. Your wide camera handles daily scenes, while the remaining modules serve narrower tasks.
| Camera type | View | Useful scene |
|---|---|---|
| Ultrawide lens | Broad frame with stronger edge stretch | Architecture, landscapes, and tight rooms |
| Wide lens | Natural everyday framing | People, food, street scenes, and low light |
| Telephoto lens | Narrower angle of view | Far subjects and flatter-looking portraits |
| Macro camera | Focuses at very short distances | Flowers, textures, and small objects |
Zoom Labels Describe Different Methods
Optical zoom changes focal length or switches to a longer lens, so the sensor captures a narrower real view. Digital zoom crops the center of an image and enlarges it. Hybrid zoom combines cropping with computational reconstruction, which can look convincing until fine detail reaches its limit.
At a 2x label, some phones crop a high-resolution wide sensor rather than switch to a telephoto module. At longer labels, the camera can switch lenses and blend image data during the handoff. Your viewfinder can shift in color or exposure because each module gathers light differently.
Distance Shapes Perspective
Stepping closer or farther changes perspective, while lens choice changes framing. Move close with an ultrawide lens and a face can look stretched around the nose. Step back and use a longer view for a more natural portrait, then crop the frame as needed.
The hardware has now framed and captured the scene. Computational photography takes that raw capture and decides how bright, smooth, sharp, and balanced your final image appears.
Computational Photography Interprets Sensor Data
A modern phone can record more than one exposure for a single photo. The image signal processor handles white balance, lens correction, noise reduction, sharpening, color rendering, and tone mapping. Your finished photo is a processed interpretation rather than a direct sensor dump.
HDR Holds Detail Across Brightness Levels
HDR, short for high dynamic range, analyzes or captures frames at different exposures. A short exposure holds detail in a bright sky, while a longer exposure reveals a shaded porch. The phone merges useful areas so your image keeps detail at both ends of the brightness range.
Strong HDR can look strange around moving leaves or fast hands because separate frames do not line up perfectly. Tone mapping also varies by phone, which is why your sunset can look warmer, punchier, or flatter than the scene felt.
Night and Portrait Modes Address Separate Problems
Night mode records several frames, aligns them, and merges their useful signal. Multi-frame image fusion brightens shadows while reducing random noise, though a moving subject can leave soft edges or ghosting. Resting your phone against a railing gives the merge cleaner source frames.
Portrait mode estimates depth from two lenses, focus data, or machine-learning scene analysis. It then simulates background blur that a larger camera can produce optically. Check hair, glasses, and fingers before sharing because depth masks can cut through fine edges.
How computational photography works comes down to selecting and merging sensor data while correcting for lens limits and hand movement. Software can improve difficult light, but it cannot recover clean detail from a severely blurred or underexposed capture.
Those limits make pixel count only one part of image quality, alongside optics, sensor size, and shooting conditions.
Image Quality Depends on More Than Megapixels
A 50-megapixel label describes sensor resolution, not photo quality. More pixels can preserve extra detail and leave more room for cropping, but they do not automatically improve low-light color, dynamic range, focus accuracy, or lens sharpness. Cell phone camera resolution explained clearly starts with that distinction.
Light Per Pixel Affects Low-Light Results
Larger sensors have more surface area to catch photons. Larger effective pixel areas collect more light during the same exposure, producing a cleaner electrical signal before noise reduction starts. Your indoor photos benefit more from that physical advantage than from a large megapixel number alone.
Many high-resolution sensors use pixel binning. Four or more neighboring sensor sites are grouped into one output pixel, trading maximum resolution for stronger low-light data. A phone can capture 12.5-megapixel images from a 50-megapixel sensor for that reason.
Real Scenes Expose the Full Camera System
- Daylight detail. Photograph brick, leaves, and fine lettering to inspect lens sharpness and over-sharpening halos.
- Indoor color. Shoot under warm household bulbs to see whether skin tones and white walls stay believable.
- Moving action. Capture a walking pet to reveal shutter-speed choices and autofocus tracking limits.
- Ultrawide corners. Inspect edge detail and straight lines because distortion correction can soften corners.
- Zoom texture. Photograph distant signs or branches to separate optical detail from enlarged digital texture.
Your side-by-side shots reveal more than a specification sheet. Shoot the same scene in similar light and inspect files at the same display zoom. A sharper image at full screen can fall apart at 100 percent, while a lower-resolution file can retain cleaner color and shadows.
Distance, Selfie Perspective, and Privacy Set Practical Limits
Usable distance has no fixed number of feet or meters. Focal length, available light, haze, subject movement, and digital cropping all shape the result. Your telephoto lens can frame a far sign, but atmospheric shimmer can erase detail long before the subject fills the frame.
Front Cameras Change Facial Appearance
A close selfie does not show your face exactly as a mirror or another person sees it. Front cameras use a wide field of view, and a short shooting distance enlarges features closer to the lens. Holding your phone farther away and using a 1.5x or 2x view reduces that distortion.
Some camera apps flip the preview so it resembles a mirror, then save an unflipped file. Familiarity also matters because your mirror image is reversed from the image other people see. Neither version is a complete verdict on how you look.
Permission Controls Restrict Camera Access
Phones do not normally record through the camera continuously. An app needs camera permission to access the hardware, and modern operating systems show camera permissions and privacy indicators while an app uses it. Check your settings screen to see which apps have camera access.
Review camera permissions after installing unfamiliar apps, remove access with no clear purpose, and install operating-system security updates promptly. Malicious software or a compromised device can bypass normal expectations.
A camera can be active without your intentional action inside a permitted app, such as a video-call screen or barcode scanner. The visible indicator is your warning sign, while permission settings and software updates reduce unwanted access.
Final Look at Your Phone Camera
Your phone camera is a compact measurement system followed by a powerful editing engine. Light quality, lens choice, focus, stability, sensor area, and processing all leave fingerprints on the file. Once you understand how smartphone cameras work, you can identify whether a weak photo came from motion, poor focus, limited light, aggressive zoom, or processing choices.
FAQ
How does a smartphone camera turn light into a photo?
A smartphone camera directs light through a lens and aperture onto a CMOS sensor. The sensor converts photons into electrical charge, an analog-to-digital converter assigns numerical values, and the ISP turns those values into a saved image file.
What do the lens, aperture, image sensor, and megapixels each do?
The lens directs light, while the aperture limits how much light enters. The image sensor converts light into data, and megapixels describe the number of image samples available for detail and cropping.
Why do phones use multiple camera lenses?
Multiple lenses give your phone distinct fields of view without relying only on cropping. An ultrawide camera captures more of a room, a wide camera handles everyday scenes, and a telephoto camera frames far subjects more tightly.
What is the difference between optical zoom, digital zoom, and hybrid zoom?
Optical zoom uses a longer focal length or a separate telephoto lens to capture a narrower real view. Digital zoom enlarges a crop, while hybrid zoom mixes cropping with computational reconstruction.
How do HDR, Portrait mode, and Night mode work?
HDR merges image data from different exposures to hold detail in bright and dark areas. Portrait mode estimates depth and blurs the background, while Night mode aligns and merges several frames to brighten shadows and reduce random noise.
Why can two phones with the same megapixel count produce very different photos?
Megapixel count does not describe lens sharpness, sensor area, pixel size, autofocus, OIS, or image processing. Your photo quality changes because each part affects the raw signal before the saved image reaches your screen.